The magic of mulch

Sunny, hot weather usually cues us that we need to get out and top up the mulch in our garden beds. But there are other reasons why your should mulch (or top up your exisiting mulch layer) at the start of summer. Here’s a few other benefits that mulching will bring:

  • Regulate soil temperatures - Mulch helps to regulate soil temperatures and supports plants that are coping with extreme weather. A mulch layer reduces heat absorption and will be cooler than soil directly exposed to sun.

  • Prevent moisture loss. Moisture loss occurs when the sun causes evaporation. But windy weather can also dry out the soil and stress your plants.  

  • Help prevent spread of disease. Mulch provides a physical barrier that protects against soil borne diseases. For example, mulching under roses can help stop black spot fungal spores in the soil from being splashed onto the leaves during a rain event.

  • Suppression of weeds. A mulch layer will block light and therefore prevent many seeds from germinating.

  • Improves soil. Some mulches such as pea straw are high in nitrogen and as it breaks down this nitrogen returns to the soil increasing nutrient content available to plants.

  • Protects from soil erosion. Without a layer of mulch covering the soil, top soil can run off your garden beds during heavy rain events.

  • Increased production. Studies have shown that plants grown in mulched beds grow faster, contain more chlorophyll, and greater root growth. If you are growing fruit and vegetables, you will harvest more food from a crop that has been mulched.

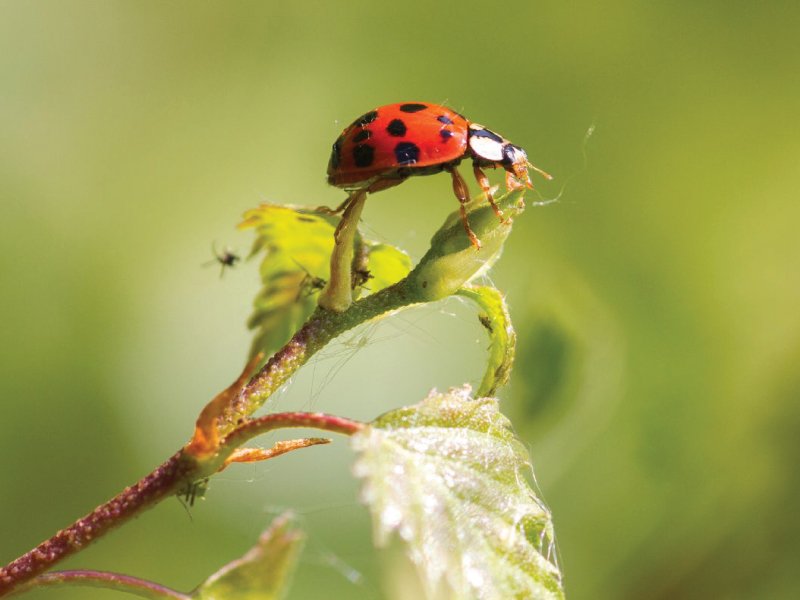
  • Indirectly, mulch can help reduce insect activity. By helping plants to improve their overall health, they become less susceptible to insect attack.

Types of mulch

There are many different materials you can use for mulch and you will find something suitable for every garden. 

  • Straw mulches (Pea Straw, Lucerne Hay, Sugar Cane) - great for the veggie patch, they can be bought in compacted bales. The hollow centres of the straw also has an insulating effect. Pea straw contains nitrogen that will break down into your soil, improving the overall condition.

  • Bark mulch - inexpensive and lightweight, bark mulches are easily spread over the garden. Larger chunks of bark will take longer to break down, but may blow away in windy weather. Bark mulch is not the best choice if using it in the vegetable garden, as it can pull nitrogen away from the plants.

  • Stones/rocks/gravel - gravel mulches are great for their water holding capacity, and also providing warmth to soil. In winter this can help support plants that don’t like cold.

  • Lawn cuttings. You can use dried grass clippings on your ornamental garden or veggie patch. This will break down and provide a good source of nitrogen. Just don’t use cuttings that have invasive weeds or if you have sprayed your lawn with herbicides.

  • Leaf litter from deciduous trees - if you have a deciduous tree, you have free mulch! In autumn, throw your leaves onto the soil and it will break down into a beautiful soil conditioner. Why waste such an amazing natural resource!

Gravel mulch

bark mulch

straw mulch

Some tips for mulching your garden

  • A good guide to how much mulch is to apply around 5-10 cm layer of mulch

  • Make sure the soil is damp when the mulch is applied, and then water the mulch once you have laid it out

  •  Avoid letting the mulch touch the stems of plants, as it can cause the plant to rot

  • If the mulch becomes water repellent, soil wetting agents can be applied to rehydrate it

  • When mulching trees, make sure you go right out to the canopy line to make sure you are protecting any shallow roots


Banishing aphids from your rose garden

We love our roses, but we aren't the only ones. Aphids love the fresh young buds of our beloved blooms, and the sight of an aphid infestation is most unwelcome! Not to worry, you can tackle this problem in a number of ways.

Beneficial insects

For the least intervention, you can let nature take it's course. This doesn't sound like logical advice, but aphids are the number one food on the menu for ladybirds. Ladybirds and their larvae (see pictured) can eat hundreds of aphids each so if you have them in your garden chances are the aphids will be gone soon! Lacewings, parasitic wasps and hoverflies are some of the other beneficial insects that will naturally control your aphids. You can also squish them with your fingers, or spray them off with the hose (both sides of the leaves).

Ladybird nymph (aka aphid hunter)

hoverfly on calendula


Hosing aphid off rose

hosing aphids off roses

Companion plants

Planting companion plants around your roses can repel aphids so try planting herbs like mint, chives, marigolds, catmint and petunias. Planting the companion plants will both repel the aphids but also attract the insects that eat the aphids!

 Using chemicals

There are sprays available such as Neel Oil, Pyrethrum, or Rose Spray, which will kill the aphids but also kill the good insects so we recommend doing this as a last resort. This is because aphids can become resistant to sprays, a similar way that antibiotic resistance occurs. So think of chemicals as your last line of defence and try to use them minimally if the above controls haven’t helped.

For more detailed information on insect control read this blog post: An abundance of insects

Is Boston Ivy the right choice for you?

Boston Ivy covering a brick fence

There’s no denying the stunning beauty of Boston Ivy (Parthenocissus tricuspidata). Along with the obvious benefits of striking autumn colour, strategically planting a creeper on a sunny wall can provide protection from summer sun without losing winter heat. It can also screen ugly walls, and provides a food source for bees.

But there are other plants within this genus (Parthenocissus) that might be more suited for your needs. So we thought we’d offer a comparison between three popular climbers (Boston Ivy, Virginia Creeper and Silver Veined Creeper) that might help you narrow down the perfect option for you.

Boston Ivy (Parthenocissus tricuspidata)

Despite the name, Boston Ivy doesn’t originate from USA, it is native to Japan. A look at the leaves will tell you it is Boston Ivy as opposed to the others. As the botanical name suggests, tricuspidata indicates it has three (tri) lobes.

Boston Ivy will take over a large area with a dense coverage of glossy green leaves (see image at top of this post). All three varieties climb using tendrils and self adhesive pads that suction onto the surface (pictured), but Boston Ivy has superior ability to stick to the surface it is growing on and is the least likely to need additional support.

Like all three, it will grow from sun to shady position and will grow in all soil types.

A key difference between Boston Ivy and the others is that Boston Ivy does not produce berries. This may be important to you if you have kids or pets, as the berries contain oxalic acid which is toxic.

Boston Ivy grows more slowly than the others, and is less of a rambler than Virginia Creeper. It will grow to fill a very large space with a thick coverage of leaves.

Virginia Creeper (Parthenocissus quinquefolia)

Identifying this plant is done in similar fashion to the Boston Ivy, take a leaf and count the leaflets. Once again, the botanical name offers the clue - quinquefolia - five leaflets. However, juvenile leaves have not yet developed into their distinct shape, so may be mistaken for Boston Ivy.

Unlike Boston Ivy, Virginia Creeper is a native to the USA, Canada and Mexico. It’s the wilder variety of the three, and will grow vigorously so if you need to cover a wall fast, this one might be a better choice. The growth habit tends to be less dense than Boston Ivy, so keep that in mind if you are trying to screen an unsightly wall. Virginia Creeper doesn’t have as strong a grip as Boston Ivy, and can get heavy on the ends, causing it to flop over. Pruning will be needed to help keep it contained.

Virginia Creeper can tolerate a wider range of temperatures than Boston Ivy which probably isn’t such an issue here in Australia as we are not subjected to extremely cold winters like in the USA.

As mentioned above, the berries are toxic so the presence of children or animals might mean you should steer clear.

Silver Veined Creeper (Parthenocissus henryana)

Silver Veined Climber is native to China. It grows around 8m x 8m, and climbs in similar fashion to the others, but not as strong as Boston Ivy. This climber would be much better option for a smaller space, like climbing over an arch or framing a window.

While it does grow in a range of locations from sun through to shade, the silver veins on the leaves will be more pronounced when it is growing in a shaded spot.

In autumn the leaves turn to a brilliant crimson colour, some people believe the Silver Veined Climber is the most vivid of the three varieties.

Berries will form on this variety.

Winter Dormancy

All three of these climbers will lose their leaves in winter. This means that for one quarter of the year the structure of the vine will be visible while the plant is dormant. For most people though, the beauty and amenity provided over the rest of the year is more than adequate compensation for the bare branches over winter.

Help! I'm an expert weed grower

Dealing with weeds

If only we could grow everything with the same ease that weeds grow in our gardens. It would make gardening so much more rewarding. But in actual fact, we’ve spoken to many people who find the job of weeding their gardens very rewarding. Yes, really (including this post writer)!

Perhaps it’s because it’s so satisfying to stand back and take in how great your garden looks when the weeds are removed. And doesn’t it feel great when the earth gives way, and you are left holding a complete root system? Plus you get a workout while you are doing it.

If you are someone who would rather not spend hours weeding, there are a few ways to make it less of a battle.

Prevention

To paraphrase Benjamin Franklin, an ounce of prevention is better than a cure when it comes to weeds. Preventing weeds from taking root will make life a lot easier than removing them.

Seeds can lay dormant in soil for a long time until conditions are just right for them to grow. Germination often occurs when the soil has been disturbed, perhaps by digging, raking, planting etc. So try to disturb your soil as little as possible.

Mulch is a powerful weapon in your weed prevention bag of tricks. You could use traditional mulches like pine bark or pea straw, or sheet mulch with cardboard or newspapers (although who reads newspapers these days?) Mulch prevents the seeds from accessing light, which is necessary for germination.

Grasses can become quite invasive if allowed into garden beds. Invest in edging to stop the runners spreading, and keep kikuya and couch lawn edges trimmed.

Don’t let weeds go to seed. Those beautiful, floaty dandelion seed heads can disburse thousands of seeds, and one gust of wind will give you a big headache in the future. (One year’s seeds, seven years weeds). If you’re busy and you haven’t got time to weed, at the very least pick the heads off the flowers as soon as they form and pop them in the bin (not in green waste).

Removing weeds

Hand weeding is highly labour intensive, but has minimal environmental impact (and as mentioned above can also be fun, rewarding and great for physical well being). To make the job a bit easier try these tips: 

  • Weed after rain or watering when the soil is softer and the roots will be pulled out much easier

  • Use a weeding fork to loosen soil so you can pull the whole root out more easily. Any root left behind will likely regrow

  • Remove weeds early. Weeds will compete with your garden plants and take over if you let them so don’t give them that chance

  • When you have pulled up your weeds, you can use them to make a weed tea. Soak in a bucket of water for a couple of months and then poor the nutrient rich liquid back onto your garden (diluted in a watering can in a ratio of 1:10)

  • If you don’t want to hand pull weeds but don’t want to use chemicals, try pouring boiling water from your kettle onto the weed.

Use of herbicides (weedkillers)

Removal by hand can cause a great deal of soil disturbance so sometimes it’s better to use a herbicide. If you do decide to use herbicide, there’s a few things to note first.

  • Try and choose the products that will have the least impact on the environment. We like to use Slasher, an organic weedkiller that works by dehydrating the plant

  • It’s not always a case of one size fits all when it comes to choosing the product. Many herbicides will only target certain types of weeds and won’t work on others. So check that you are using the right spray

  • If you are looking to kill weeds in your garden, you can buy a weed/feed type product but it’s important that you know the type of lawn you have otherwise you might end up with a dead lawn

  • When you have sprayed your lawn, avoid walking on it afterwards so you don’t then spread the weedkiller to other parts of your garden

  • When spraying, choose your moment. Don’t spray when it’s windy as overspray may affect other plants

  • Using a watering can is better for preventing overspray/drift of the weedkiller than a hose on application

  • If rain is forecast, give spraying a miss

  • Protect surrounding plants by covering them with plastic.

A word about glyphosate

Glyphosate, the active ingredient in weedkillers such as Round Up or Zero, is controversial and there are differing opinions on whether it is safe to use, as well as numerous lawsuits against the company.

While research suggests that Glyphosate is not residual in the soil, other research suggests that the surfactants added to Glyphosate to make it easier for the plant to absorb the product are quite toxic to animals, fish and aquatic organisms. There is also some evidence that it has soil mobility, meaning that there is the potential for it to leach into waterways. If these chemicals find their way into our water systems it can lead to environmental damage.

While there is so much conflicting information regarding glyphosate and experts are unable to agree on the impact, it’s fair to say that we should all think twice before using chemicals and only spray as a last resort.

If you can’t beat them…

And for a different take on weeds, there are many people within our community who embrace weeds for their nutritional value and for their medicinal properties (always confirm the species first to make sure it is not toxic. If you’re not sure, leave it alone). Anyway, that’s a blog post for another day, but if you are sick of the fight against weeds, maybe cultivating them might be more your thing.

Summer watering

Watering is important to keep your garden healthy and resilient during the heat of summer. But it's not always straight forward, and sometimes we end up accidentally killing our plants by watering too much or not enough. Here's a few tips on how to water your garden in summer.

  • Watering deeply every few days is usually better than watering every day. A deep watering will encourage roots to dive down to seek out the water and will build larger, healthier root systems that will help them survive when it’s dry. (A veggie garden that is actively producing food will most likely need daily watering).

  • Pots need to be watered daily, and possibly more than once a day if it’s very hot and windy. Terracotta pots will dry out a lot faster than plastic pots.

  • Don’t water in the middle of the day – you will lose water to evaporation. It is much better to water in the morning or in the early evening.

  • Note that if you water in the evening, plants that are still wet when the sun goes down can be susceptible to fungal diseases so try not to water the leaves if watering in the evening - aim the water at the soil and avoid the foliage.

  • Better still, have an irrigation system installed that can deliver water slowly and efficiently to the plant root zone without you having to remember to do it.

  • Trees need to be watered right out to the drip line of the canopy rather than just at the base of the trunk.

  • Succulents need water too! Water deeply once a week in the morning if the soil is dry (make sure they are draining freely). If the soil feels moist then wait a couple of days.

  • Watch the soil surface when you are watering. If the water seems to pool on top and doesn’t absorb, scratch the top of the soil. If it’s dry under the top layer, your soil is hydrophobic and your plants are not getting any water in their root zone. Wetting agents can help with rehydrating the soil.

  • Newer plants will need more water than established plants while their roots are establishing.

  • While native plants and drought tolerant plants can survive dry periods much longer, they still need to be watered, particularly young plants that are trying to establish themselves.

  • Mulch on the garden beds will help the soil stay moist for longer.

  • Finally, don't forget to leave some water out for wildlife. Your neighbourhood birds, reptiles and bees will appreciate it!